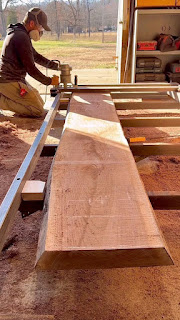
Unlock Your Inner Craftsperson: Step-by-Step Woodwork Plans for Beginners
The scent of freshly cut wood, the satisfying whir of a saw, the pride of creating something with your own two hands – woodworking offers a rewarding journey for beginners and seasoned craftspeople alike. This guide provides easy-to-follow plans, perfect for your first foray into this captivating hobby. Forget daunting complexity; we'll break down the process into manageable steps, empowering you to build your first project with confidence.
Choosing Your First Project: A Simple Shelf
Starting with a simple project builds confidence and teaches fundamental techniques. A small, floating shelf is an excellent choice. It requires minimal tools and showcases basic woodworking skills, like measuring, cutting, and assembling. Don't be intimidated by the seemingly endless possibilities; focus on mastering the fundamentals first. This solid foundation will serve you well as you progress to more intricate projects.
Gathering Your Materials
Before you even pick up a saw, meticulously gather your materials. This prevents frustrating delays later on. For your shelf, you'll need:
- Two pieces of wood for the shelf supports (approximately 8 inches long and 2 inches wide, depending on desired shelf length). Choose a softwood like pine for its ease of working.
- One piece of wood for the shelf (length determined by your preference, and width to match supports).
- Wood glue.
- Wood screws (choose a size appropriate for the wood thickness).
- Sandpaper (various grits, from coarse to fine).
- Wood stain or paint (optional).
Cutting the Wood to Size
Precise cutting is crucial. Using a measuring tape, carefully mark your wood according to your measurements. A handsaw or miter saw will work perfectly for this project. Always remember safety first: wear safety glasses and ensure the wood is securely clamped before making any cuts. Take your time; clean, precise cuts will lead to a more professional-looking finish.
Assembling the Shelf
Apply wood glue to the ends of the shelf supports. Carefully position the shelf onto the supports, ensuring it is aligned and level. Pre-drill pilot holes to prevent the wood from splitting when screwing in the screws. This is a critical step for beginners. Finally, drive in the screws, securing the shelf firmly to the supports.
Finishing Touches: Sanding and Staining
Once assembled, your shelf will likely have some rough edges. This is where sanding comes in. Start with coarser sandpaper to remove any major imperfections, then gradually move to finer grits for a smooth finish. Sanding is essential for a professional look and feel. After sanding, you can enhance the appearance with a wood stain or paint. Apply thinly and evenly, allowing for sufficient drying time between coats.
Mounting Your Shelf
The final step involves mounting the shelf to the wall. Use appropriate wall anchors based on your wall type and the weight of the shelf. Precisely mark the position of the shelf supports and drill pilot holes for the anchors. Securely mount the shelf, ensuring it's level and firmly attached. Congratulations, you've completed your first woodworking project!
Beyond the Shelf: Exploring Further Projects
This is just the beginning! With your newfound skills and confidence, you can explore more complex projects. Consider building a simple birdhouse, a small wooden box, or even a coat rack. The possibilities are endless, and each project will further refine your woodworking skills and enhance your creativity.


No comments:
Post a Comment